Not All Small Panels are Created Equal
I’ve spent a lot of time on factory floors, and I can tell you: making a tiny solar panel is often harder than making a giant one. When you’re dealing with a 50mm component, there is zero room for error.
Understanding mini solar panel manufacturing helps buyers evaluate quality, durability, and long-term performance. If you are sourcing OEM solar panels, understanding the solar panel manufacturing process is just as important as the price. A cheap process leads to a product that fails in the rain. Let’s look at how we build high-end panels like our Rigid Mini ETFE Series.
Table of Contents
1. Step 1: Precision Dicing
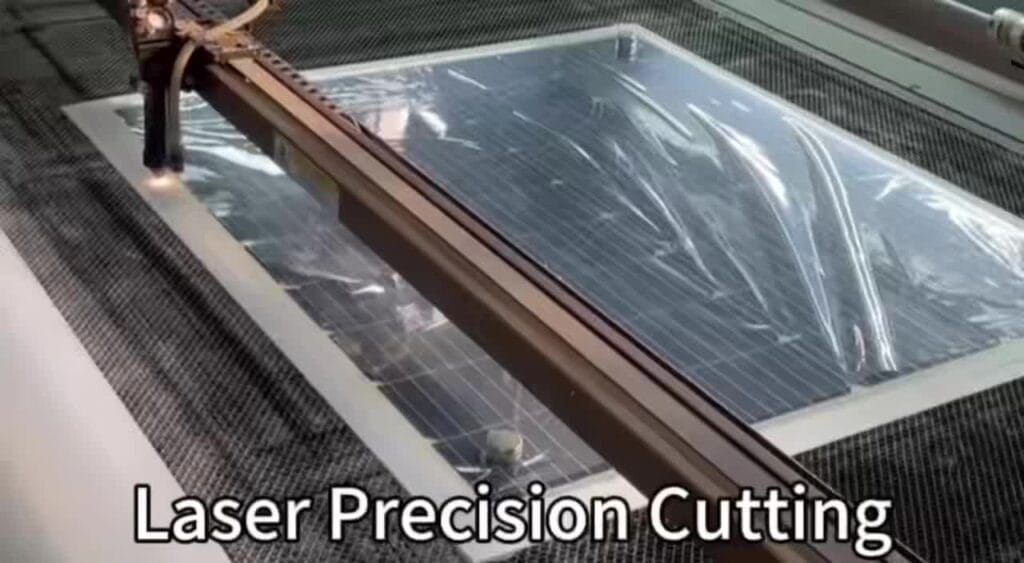
The mini solar panel manufacturing process starts with large 182mm or 210mm solar wafers. To make a mini panel, we have to cut these into smaller strips.
- The Tool: We use automated laser dicing machines.
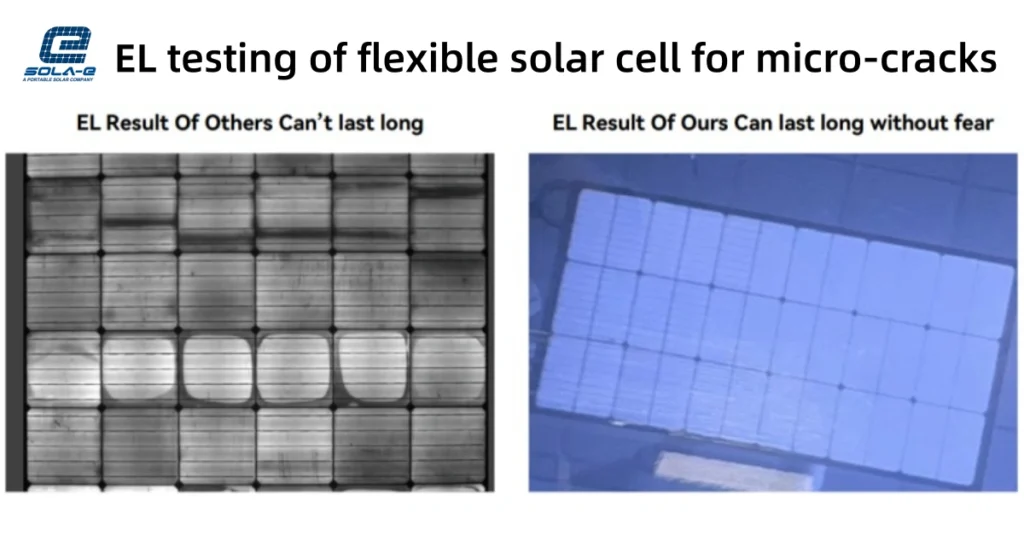
- The Goal: We need clean edges. If the cut is jagged, it creates “micro-cracks” that can kill the panel’s output after a few weeks of heat expansion.
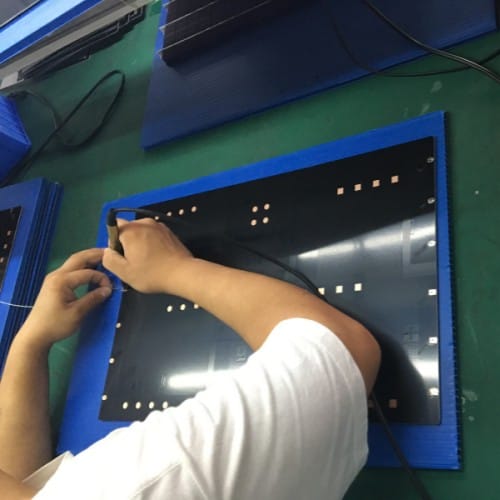
2. Step 2: Stringing and Layout
Once we have our small cell strips, we connect them. This is called “stringing.”
In our Mini PET Series, we use specialized copper ribbons to link the cells. In a mini panel, space is tight. Our technicians must solder these connections with extreme heat control to avoid “thermal shock” to the fragile silicon.

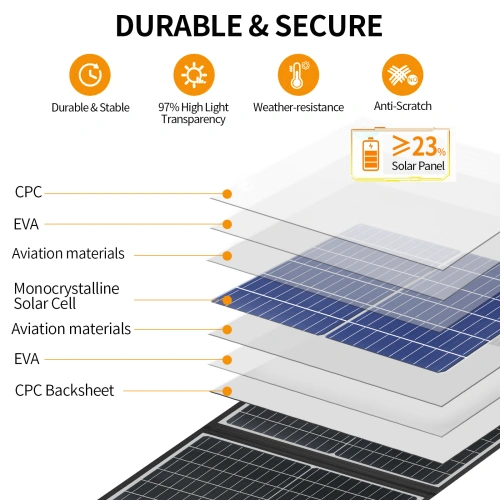
3. Step 3: The “Sandwich” Layer
This is where the magic happens. A professional mini solar panel is a 5-layer sandwich:
- Top Layer: ETFE or PET film.
- Encapsulant: EVA (Ethylene Vinyl Acetate).
- The Power: The Solar Cells.
- Encapsulant: Another layer of EVA.
- Backsheet: A rigid PCB or specialized backing.
For more details on how these materials affect your product, see our ETFE vs PET solar panel comparison.
4. Engineer’s Note: The Lamination Divide
This is the most critical part of the manufacturing story. There are two ways to finish a panel.
Professional Lamination (What We Do)
The solar panel lamination process involves placing that “sandwich” into a Vacuum Heat Laminator.
“The materials are fused together under high pressure, creating a dense, flat structure that seals out moisture.” — Sola-E Engineering Team
Epoxy Dropping (The Cheap Alternative)
Many low-end factories skip the laminator. Instead, they manually drop liquid A+B resin onto the cells.
- The Pitfall: Because it isn’t sealed under a vacuum, air bubbles and moisture stay trapped inside, leading to the yellowing and failure we’ve discussed in our durability guide.
5. Step 5: Testing and Quality Control
Before any panel leaves the Sola-E floor, it goes through an IV tester (Current-Voltage tester). We simulate the sun to ensure the wattage is exactly what the client ordered. For custom solar panel manufacturing, we also check dimensions down to the millimeter.
6. FAQ
1. Are mini solar panels manufactured the same way as large panels?
Yes. The main difference is the cell dicing process. Mini panels require cutting full-size solar cells into smaller strips before lamination, which requires higher precision.
2. Why is vacuum lamination important for solar panels?
Vacuum lamination removes air bubbles and moisture, creating a hermetically sealed structure that protects solar cells from humidity and UV damage for 5–10+ years.
3. Can I customize the size during the manufacturing process?
Absolutely. Since we use laser dicing, we can cut cells to almost any dimension to fit your specific device housing.
Part of Our Mini Solar Panel Engineering Series
This article is part of our deep-dive series for engineers and B2B buyers:
- ETFE vs PET Mini Solar Panels: Which One Lasts Longer?
- How Mini Solar Panels Are Manufactured (You are here)
- Next up: Why Mini Solar Panels Fail in the Field (Coming Soon)
Want to see our manufacturing in action?
We specialize in high-quality lamination for custom OEM projects. Let’s build a panel that lasts.